Monochrome Photography Guide: Black and White Camera Settings & Techniques
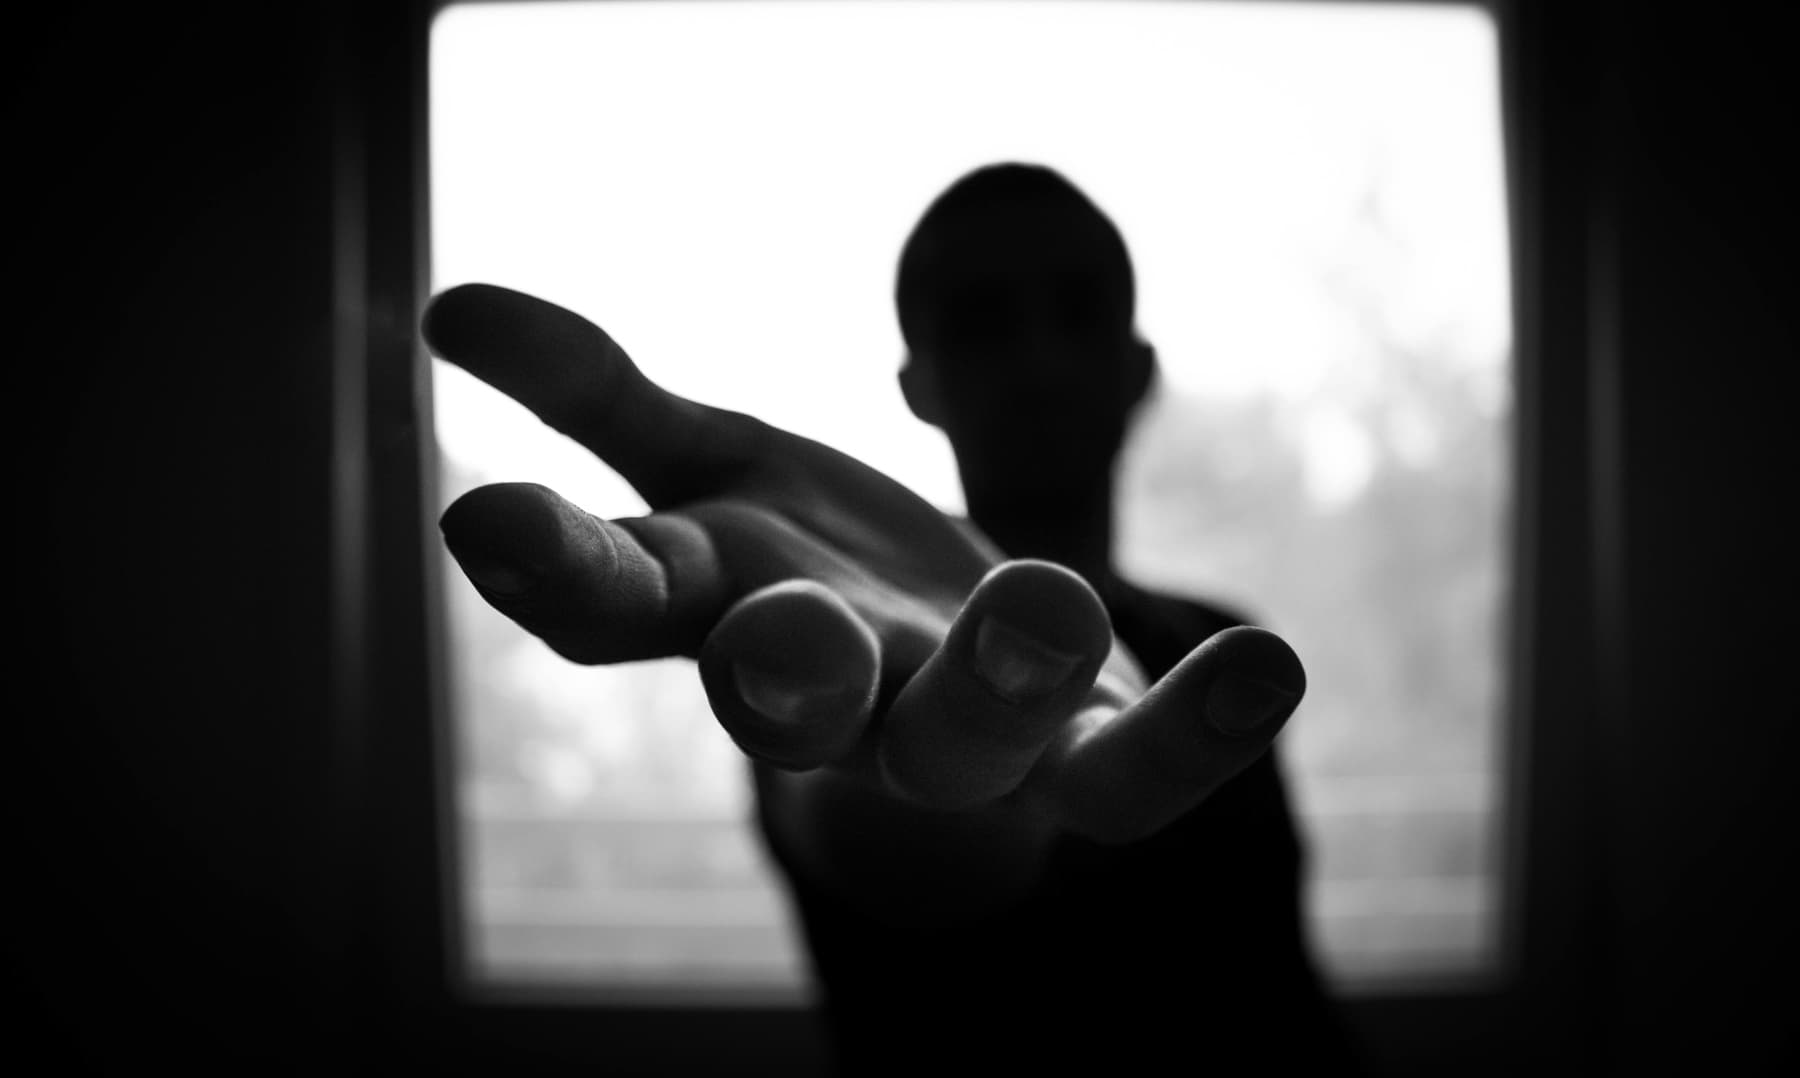
Monochrome photography strips away the safety net of color and forces you to see the world differently. That colorful sunset that looks stunning to your eye? On black and white film, it might render as flat and boring gray. Without vibrant hues to lean on, you need to visualize how colors will translate to shades of gray, how contrast will shape the image, and how texture will define your subject before you even press the shutter.
What You'll Learn
This comprehensive guide covers everything you need to master monochrome photography on film—from essential gear and camera settings to contrast techniques, composition strategies, and post-processing workflow. Whether you're shooting portraits, architecture, or street scenes, you'll find actionable advice to capture stunning images with authentic film aesthetics.
Who This Guide Is For
Photographers (beginners to advanced) who want to master the art of shooting in black and white, understanding how to see in grayscale, control contrast and tonal range, and create timeless images without relying on color.
The challenge and reward of monochrome photography
Here's the thing about monochrome photography: you need to see in grayscale before you even shoot. You're visualizing how colors translate to tones, finding contrast where others just see color. Without those hues to separate your subject from the background, you're working with pure light and shadow.
When you nail it though, you capture timeless images with emotional depth that color sometimes can't touch. The tonal range and organic grain of black and white film create a depth that digital conversions struggle to match. The difference comes down to pre-visualization and understanding how contrast works on film.
Essential equipment for monochrome photography
You don't need the most expensive gear to shoot great monochrome photos, but certain tools make a significant difference.
Camera body requirements
Manual SLRs with reliable metering are your best bet for monochrome work. A Nikon FE2 offers dependable metering and accepts a wide range of lenses. The Pentax 67 delivers exceptional medium format tonal range if you want to go big. The Contax T2 works beautifully for street work. Budget option: honestly, any manual SLR with a working meter will get you started.
Lenses that work
A 50mm f/1.8 offers versatility. A 28mm f/2.8 works for architecture photography. An 85mm f/2 provides flattering perspective for portraits. Wide apertures isolate subjects, narrow apertures maximize depth.
Film stocks & accessories
For traditional black and white film, Tri-X 400 is the classic choice—beautiful grain and excellent tonal range. HP5 Plus 400 offers similar characteristics with slightly finer grain. Delta 400 gives you modern fine grain if you want smoother tones.
Here's something interesting: color film converts to monochrome beautifully. Portra 400 offers excellent tonal separation when converted. Portra 160 provides fine grain and smooth midtones. Ektar 100 gives higher contrast. Kodak Gold creates warm-toned conversions with character.
Essential accessories: a handheld exposure meter for precise readings, yellow/orange/red filters for sky control, cable release for tripod work, and a lens hood to prevent flare.
Camera settings for monochrome photography
Start with these settings as your foundation, then adapt based on conditions.
Exposure & metering
Here's a key principle for black and white film: meter for the shadows and let the highlights fall where they may. Film has 5-7 stops of latitude, which gives you breathing room.
Settings recipe:
- Film: Tri-X 400 (ISO 400)
- Aperture: f/5.6 to f/8
- Shutter speed: 1/125 to 1/250
- Metering: Spot meter shadows, open 1 stop
- Push/pull: Push for contrast, pull for softer tones
If you're shooting color film to convert later: Portra 400 separates tones beautifully. Just meter for midtones normally.
- •Film: Tri-X 400 (ISO 400)
- •Aperture: f/5.6 to f/8
- •Shutter speed: 1/125 to 1/250
- •Metering: Spot meter shadows, open 1 stop
- •Push/pull: Push for contrast, pull for softer tones
Focus technique
Manual focus ensures precision. Use split-prism focusing screen.
Focus on key elements—eyes for portraits, architectural details, main subjects. At f/8, depth covers adequate range.
Zone focusing for street: at f/8, set to 10 feet for sharpness from 6 to 20 feet.
Film handling & technique
Push processing is your friend when you want more contrast and grain—shoot Tri-X 400 at ISO 1600, then push it in development. Pull processing does the opposite, creating low contrast and softer tones for a gentler look.
Color filters make a huge difference in monochrome work: yellow darkens skies moderately, orange more dramatically, and red turns skies nearly black for maximum drama. Just remember to compensate exposure: yellow +1 stop, orange +1.5 stops, red +2 stops.
Composition & creative techniques
Technical settings get you sharp, well-exposed images. Composition makes them compelling.
Seeing in grayscale
The first skill you need to develop is seeing in grayscale before you shoot. Try squinting your eyes to reduce color perception and see tonal relationships more clearly. Spend time just looking at scenes and imagining them stripped of color—what works? What falls flat?
Contrast & tonal range
Monochrome photography lives and dies on contrast. High contrast creates drama and impact. Low contrast creates subtle, contemplative mood.
Look for contrast in your scenes: side light creates dimension through shadow, backlight creates silhouettes. Position yourself so light and shadow separate your subject from the background.
Film captures roughly 10-12 distinct gray tones from pure black to pure white. Try to use this full range—include both deep shadows and bright highlights for maximum visual impact.
Texture, patterns & shapes
Without color to grab attention, texture becomes your primary visual interest. Look for tactile surfaces—weathered wood, rough stone, fabric weave. Side light at low angles emphasizes texture beautifully through micro-shadows.
Patterns create visual rhythm in monochrome work. Architectural elements, natural formations, repeated shapes all gain prominence. Break the pattern with one contrasting element for a focal point. Shapes define your composition—geometric shapes create structure, organic shapes create flow.
Genre-specific composition tips
Portraits: focus on expression and lighting. Soft pastels and matte colors translate to midtones.
Architecture photography and urban photography: emphasize lines and contrast. Use filters to darken sky.
Street scenes: capture decisive moments. Shoot at f/8 for zone focusing.
Lighting techniques for monochrome photography
Light makes or breaks black and white film photos. Here's how to work with it.
Natural light strategies
Natural light from windows or low sun creates beautiful dimension through shadow, revealing texture and form.
Different conditions work for different moods:
- Bright sun: harsh light creates strong contrast for dramatic images with deep shadows
- Overcast: soft light reduces contrast—you can push your film in development to add it back
- Open shade: diffused light creates low contrast, perfect for high key photography with a gentle feel
- Golden hour: low-angle light creates long shadows and emphasizes texture
Pro tip: position your subjects so natural light comes from about 45 degrees (side light) for the most dimensional look.
- •Bright sun: harsh light creates strong contrast for dramatic images with deep shadows
- •Overcast: soft light reduces contrast—you can push your film in development to add it back
- •Open shade: diffused light creates low contrast, perfect for high key photography with a gentle feel
- •Golden hour: low-angle light creates long shadows and emphasizes texture
Artificial light approach
A single light source creates dramatic contrast and defined shadows. Window light indoors is perfect—it provides soft, directional side light for classic portraits. Meter for the shadow side of the face, open 1 stop, and let the window-lit side go bright.
Bounce flash off a ceiling or wall creates soft, even light for low contrast portraits. Direct flash creates harsh shadows and high contrast—use it deliberately for dramatic effect.
Settings for window light portraits: Tri-X 400, f/2.8 for shallow depth, 1/60 to 1/125 shutter, meter for shadows.
Challenging lighting scenarios
Film handles challenging light surprisingly well:
- Mixed lighting: doesn't matter—tungsten, fluorescent, daylight all become gray tones
- High contrast scenes: film's latitude handles extremes better than you'd think
- Low light: push your film to ISO 1600 or 3200 for grain and contrast
- Flat light: use filters to create separation or add contrast in development
- •Mixed lighting: doesn't matter—tungsten, fluorescent, daylight all become gray tones
- •High contrast scenes: film's latitude handles extremes better than you'd think
- •Low light: push your film to ISO 1600 or 3200 for grain and contrast
- •Flat light: use filters to create separation or add contrast in development
Monochrome photography workflow & shooting tips
A systematic approach to black and white film photography increases your success rate.
Preparation & planning
Before you head out, visualize your scenes in grayscale. Ask yourself: does this scene have strong contrast? Interesting textures? Compelling shapes?
Quick checklist: load your film, pack filters (yellow, orange, red), check your exposure meter batteries.
Here's a pro tip: scout locations in harsh midday light. This reveals the contrast and shadows that will work beautifully in monochrome.
During the shoot
Start by metering carefully. Spot meter on the darkest area where you want detail, then open 1 stop. This ensures shadow detail while letting highlights roll off naturally.
Shot progression: establish shots showing the overall scene, medium shots focusing on key elements, detail shots emphasizing texture, and experimental shots playing with extreme contrast.
Use filters to control your sky: yellow for subtle darkening, orange for moderate drama, red for near-black skies. Remember to compensate exposure: yellow +1, orange +1.5, red +2.
Bracket important shots: meter reading, +1 stop, -1 stop.
Adapting to challenges
Quick fixes when things aren't working: flat lighting (use an orange or red filter), too much contrast (meter for highlights instead), boring scene (look for texture or shadows).
Post-processing monochrome photography
Black and white film photos benefit from careful printing or scanning decisions—enhancement rather than transformation.
Essential adjustments
When you get your film back, communicate with your lab about desired contrast level—normal, high contrast, or low contrast. For scanned images: set your black and white points, add moderate contrast to separate tones, dodge areas that need detail, and burn areas that distract.
Most scans benefit from a 15-20% contrast increase to make tones separate clearly. Use the curves tool for precise control over highlights, midtones, and shadows independently.
Genre-specific techniques
For portraits: enhance eye contrast to draw attention, add gentle vignetting to focus on the face. For architecture photography: increase clarity to emphasize texture and detail, add contrast to separate building from sky. Film's fine grain allows aggressive sharpening without artifacts. For street photography: embrace the grain from pushed film, add contrast for dramatic mood. The vintage photo aesthetic suits documentary work perfectly.
Consistency & style
Decide on your style early: high contrast and dramatic, or low contrast and subtle. Apply similar development and printing choices across your work to build a cohesive portfolio.
Common mistakes & how to avoid them
Even experienced photographers make these monochrome mistakes. Here's how to avoid them.
Mistake 1: Shooting colorful scenes
I see this all the time: photographers shoot scenes where color is the main interest, then wonder why the monochrome version looks flat and boring.
Solution: Before you shoot, ask yourself if the scene has contrast, texture, or compelling shapes independent of color. If the answer is no, save your film for a better subject.
Mistake 2: Ignoring contrast
Shooting in flat, even light results in muddy images with poor tonal separation. Without contrast, your photos lack visual impact.
Solution: Seek out side light or harsh directional light that creates shadows. Use filters to add sky contrast. Position yourself for maximum tonal separation between subject and background.
Mistake 3: Not pre-visualizing
Shooting without visualizing how colors translate to gray tones results in disappointing scans. What looked interesting in color becomes flat in monochrome.
Solution: Train yourself to see in grayscale before you shoot. Squint your eyes to reduce color perception. Study great monochrome photography to understand what works.
Mistake 4: Underutilizing latitude
Metering too conservatively results in thin negatives with poor tonal range. Film has excellent latitude—use it.
Solution: Meter for the shadows and expose generously. Black and white film handles overexposure better than underexposure. When in doubt, open up 1 stop from your meter reading.
Pro monochrome photography tips & techniques
Once you've mastered the basics, these advanced techniques elevate your black and white film photography.
Push your film for grain and contrast: Shoot Tri-X 400 at ISO 1600 or 3200, then push it in development. This creates heavy grain and high contrast that's perfect for street photography and dramatic portraits. The vintage photo aesthetic suits documentary work beautifully.
Use red filters for dramatic skies: A red filter turns blue skies nearly black, creating stunning contrast with white clouds. This technique makes architecture photography and landscapes way more dramatic. Just remember to compensate exposure by opening 2 stops.
Shoot color film for monochrome: Here's something interesting—Portra 400 and Portra 160 convert to black and white beautifully, offering finer grain and better tonal separation than traditional black and white film. This gives you flexibility to keep it in color or convert to monochrome later.
Embrace high key photography and low contrast: Not every shot needs drama. Overcast light with Portra 160 creates soft pastels and matte colors that convert to gentle, high key images with subtle tonal gradations.
Film's timeless art, your pocket
Monochrome photography on film represents a unique artistry—the organic grain structure, the exceptional tonal range, the tangible satisfaction of seeing a perfectly printed image. At Daydream, we've spent years studying these exact characteristics—the gentle tonal gradations, the authentic grain patterns, the way film renders light and shadow—to bring authentic film emulation to mobile photography. We're not replacing film; we're making it accessible for those moments when loading a roll isn't practical. Our app is free, with no subscription or ads, because we believe more people should experience what film photography offers. Whether you shoot with black and white film, a phone running Daydream, or both—you're part of keeping the film aesthetic alive.
Gear recommendations summary
* Prices as of December 2024 – always check current pricing. These are starting points, not requirements.
| Category | Budget Option | Mid-Range | Professional |
|---|---|---|---|
| Camera Body | Pentax K1000 ($100-200) | Nikon FE2 ($300-500) | Pentax 67 ($800-1500) |
| Primary Lens | 50mm f/1.8 ($50-100) | 28mm f/2.8 ($200-400) | 85mm f/1.8 ($300-600) |
| B&W Film | Kentmere 400 ($6-8/roll) | Tri-X 400 ($10-12/roll) | Ilford Delta 400 ($12-14/roll) |
| Filters | Yellow filter ($15-30) | Orange filter ($20-40) | Red filter + holder ($40-80) |
FAQs (intent catchers)
What are the best camera settings for monochrome photography?
For black and white film, start with Manual mode, ISO 400 film (Tri-X 400 or HP5 Plus), f/5.6 to f/8 for balanced depth, and 1/125 to 1/250 shutter speed for handheld shooting. Spot meter on shadows and open 1 stop to ensure shadow detail. These settings work for most monochrome subjects. Push black and white film to ISO 1600 for grain and contrast, or use normal development for classic tonal range.
What camera is best for monochrome photography?
The best camera for black and white film has reliable metering, accepts filters, and offers manual control. The Nikon FE2 excels at monochrome work with accurate center-weighted metering and sturdy build, while the Pentax 67 offers exceptional medium format tonal range. For beginners, any manual SLR that accepts black and white film works. Honestly, learning to see in grayscale matters more than expensive camera bodies.
Should I shoot black and white film or convert color film?
Both approaches work. Traditional black and white film (Tri-X 400, HP5 Plus) offers classic grain and can be pushed for contrast. Color film (Portra 400, Portra 160) converted to black and white provides finer grain and excellent tonal separation. Shoot black and white film when you want authentic grain and can commit to monochrome. Shoot color film when you want flexibility to keep in color or convert to black and white later.
How do I get good contrast in black and white photography?
Good contrast in black and white film comes from lighting and development. Seek side light or backlight that creates shadows. Use filters (orange or red) to darken skies. Push black and white film in development for higher contrast. Meter for shadows to ensure both shadow detail and bright highlights. Position yourself so light and dark areas are adjacent—proximity increases perceived contrast.
What subjects work best in black and white photography?
Black and white film works best for subjects with strong contrast, interesting texture, or compelling shapes. Portraits emphasize expression and emotion. Architecture photography highlights lines and geometry. Street photography captures decisive moments and human drama. Textures (weathered surfaces, fabric, natural patterns) become focal points. Avoid subjects where color is the main interest—flowers, sunsets, colorful objects lose impact in black and white.
Can I use filters with black and white film?
Yes, colored filters dramatically improve black and white film photography. Yellow filters darken blue skies moderately and are good for general use. Orange filters darken skies more for dramatic effect. Red filters turn skies nearly black for maximum contrast in architecture photography and landscapes. Filters screw onto your lens and control how colors translate to gray tones on black and white film. Compensate exposure: yellow +1 stop, orange +1.5 stops, red +2 stops.
How do I develop black and white film for best results?
Black and white film development offers creative control. Normal development at box speed (ISO 400 for Tri-X 400) provides classic tonal range. Push processing (develop at ISO 800-3200) increases contrast and grain for dramatic effect. Pull processing (develop at ISO 200) reduces contrast for softer, low contrast tones. Communicate with your lab about desired contrast level, or develop at home for complete control over your black and white film's final look.
What's the difference between black and white film and color film converted to monochrome?
Black and white film (Tri-X, HP5 Plus) offers authentic grain structure, can be pushed for contrast, and provides classic black and white aesthetic. Color film (Portra 400, Portra 160) converted to black and white offers finer grain, smoother tones, and flexibility to keep in color. Both create excellent black and white images. Choose black and white film for authentic grain and committed monochrome vision. Choose color film for versatility and finer grain.
Conclusion: Your monochrome photography journey
Monochrome photography demands seeing the world in grayscale, finding contrast and texture, and trusting film to render your vision. Start with proper metering—expose for shadows and let film's latitude handle the highlights. Practice pre-visualization before every shot.
Here's the truth: even experienced photographers struggle with monochrome at first. We've all shot colorful scenes that fell flat in grayscale. The difference between struggling and succeeding is learning to see in tones rather than colors.
Next steps:
- Load some black and white film: start with Tri-X 400 or HP5 Plus for classic results
- Practice pre-visualization: spend a day seeing scenes in grayscale before you shoot
- Shoot a full roll: focus on contrast, texture, and shapes rather than color
Monochrome photography rewards patience and vision. Your unique perspective matters because film captures tonal range in ways digital can't match. Now get out there and see the world in shades of gray.
- •Load some black and white film: start with Tri-X 400 or HP5 Plus for classic results
- •Practice pre-visualization: spend a day seeing scenes in grayscale before you shoot
- •Shoot a full roll: focus on contrast, texture, and shapes rather than color
Author notes (E-E-A-T)
Written by: Daydream Content Team — photographers with 15+ years shooting black and white film across multiple genres including portrait, street, architectural, and landscape photography
Experience: Extensive monochrome work on both traditional black and white film stocks (Tri-X, HP5 Plus, T-Max) and color film converted to black and white (Portra series). Hundreds of rolls developed with various push/pull techniques. Deep understanding of pre-visualization, contrast control, and tonal range management specific to film photography.
Gear used: Nikon FE2, Pentax 67, Contax T2, Olympus Mju II, various prime lenses (28mm, 50mm, 85mm). Primary film stocks: Tri-X 400, HP5 Plus 400, Portra 400, Portra 160 (converted to B&W).
Teaching background: Workshop instruction for film photographers, focus on seeing in grayscale and mastering black and white film development techniques
Conflicts of interest: None. No affiliate relationships. Daydream app mentioned as complementary tool for film photographers.
Related Topics
Related Articles
Coming Soon to iOS
Join the beta to experience authentic film photography with Daydream Film when we launch.