Architecture Photography Guide: Camera Settings, Composition & Perspective Tips
Architecture photography reveals its challenges the moment you tilt your camera upward. Suddenly, that skyscraper leans backward, vertical lines converge, and what looked majestic to your eye looks distorted in the frame. Film cameras make these challenges both harder and more rewarding. You're managing perspective distortion, calculating exposures for high-contrast scenes, and trusting your composition without instant feedback.
What You'll Learn
This comprehensive guide covers everything you need to master architecture photography on film, from essential gear and camera settings to perspective control techniques, compositional strategies, and working with natural light. Whether you're shooting historic buildings, modern skyscrapers, or interior spaces, you'll find actionable advice to capture structures with authentic film aesthetics.
Who This Guide Is For
Photographers (intermediate to advanced) who want to document buildings and architectural spaces on film, understanding the unique challenges of perspective control and exposure management without digital safety nets.
The challenge and reward of architecture photography
Architecture photography demands technical precision and spatial awareness. You're keeping vertical lines perfectly straight, managing extreme contrast between bright windows and dark interiors, and composing within fixed perspectives. On film, these challenges multiply because you can't check results until weeks later.
When you nail it, you capture buildings with dimension and presence that makes viewers feel the scale and design intent. Film's organic grain adds texture to surfaces that digital sharpness can't match. The difference comes down to understanding perspective control, metering discipline, and trusting your technical knowledge without instant feedback.
Essential equipment for architecture photography
Certain tools are non-negotiable for architecture photography on film. Unlike other genres, this work demands specialized equipment.
Camera body requirements
Manual SLRs with reliable metering and sturdy build quality handle architecture work well. A Nikon FE2 offers dependable metering and accepts perspective control lenses. The Pentax 67 delivers exceptional detail for medium format architectural documentation. Budget option: any manual SLR with interchangeable lenses works if you have an external light meter.
Lenses that work
Wide-angle lenses (24mm to 35mm) capture expansive building facades and tight interior spaces. A 28mm f/2.8 offers versatility for most architectural work. For perspective control, tilt-shift lenses (24mm or 35mm) correct converging verticals without post-processing. These specialized lenses cost significantly more but deliver straight lines in-camera.
Standard focal lengths (50mm) work for architectural details and tighter compositions. Telephoto lenses (85mm-135mm) isolate specific design elements from a distance.
Film stocks & accessories
For architecture photography, Ektar 100 provides fine grain and exceptional sharpness for detailed building documentation. Portra 400 offers versatility for mixed lighting conditions. Portra 160 renders soft pastels beautifully for interior spaces. For black and white architectural work, emphasize contrast and texture with Tri-X 400 or HP5 Plus. Kodak Gold 200 offers affordability for practice.
Essential accessories: sturdy tripod (absolutely required), cable release, bubble level (critical for straight lines), external light meter for spot metering, lens hood, notebook for exposure notes.
Camera settings for architecture photography
Start with these settings, then adapt based on conditions. Architecture photography on film requires understanding depth of field and exposure latitude.
Exposure & metering
For architecture photography, use small apertures (f/8 to f/16) to keep everything sharp from foreground to background. This deep depth of field ensures architectural details remain crisp throughout the frame.
Settings recipe for exterior architecture:
- Film: Ektar 100 (ISO 100)
- Aperture: f/11 or f/16
- Shutter speed: 1/60 to 1/125 (tripod allows slower)
- Metering: Spot meter on midtones
Settings recipe for interior architecture:
- Film: Portra 400 (ISO 400)
- Aperture: f/8 or f/11
- Shutter speed: 1-4 seconds (bulb mode, tripod required)
- Metering: Incident meter or spot meter on walls
Small apertures demand slower shutter speeds. A tripod becomes mandatory. At f/16, ISO 100, expect shutter speeds of 1/30 second or slower even in bright conditions. For interiors with window light, exposures extend to several seconds.
- •Film: Ektar 100 (ISO 100)
- •Aperture: f/11 or f/16
- •Shutter speed: 1/60 to 1/125 (tripod allows slower)
- •Metering: Spot meter on midtones
- •Film: Portra 400 (ISO 400)
- •Aperture: f/8 or f/11
- •Shutter speed: 1-4 seconds (bulb mode, tripod required)
- •Metering: Incident meter or spot meter on walls
Managing contrast
Architecture photography presents extreme contrast. Bright windows against dark interiors exceed film's latitude. Expose for highlights and accept dark shadows, or expose for midtones and accept blown windows. Bracketing is essential: shoot at calculated exposure, -1 stop, +1 stop.
Focus technique
Manual focus in architecture demands precision. Focus one-third into the scene to maximize depth of field through hyperfocal distance. Use your viewfinder's split-prism or ground glass to verify sharpness. With practice, you'll trust focus placement for architectural sharpness.
Composition & creative techniques
Technical settings get you exposed images. Composition captures the essence of architecture.
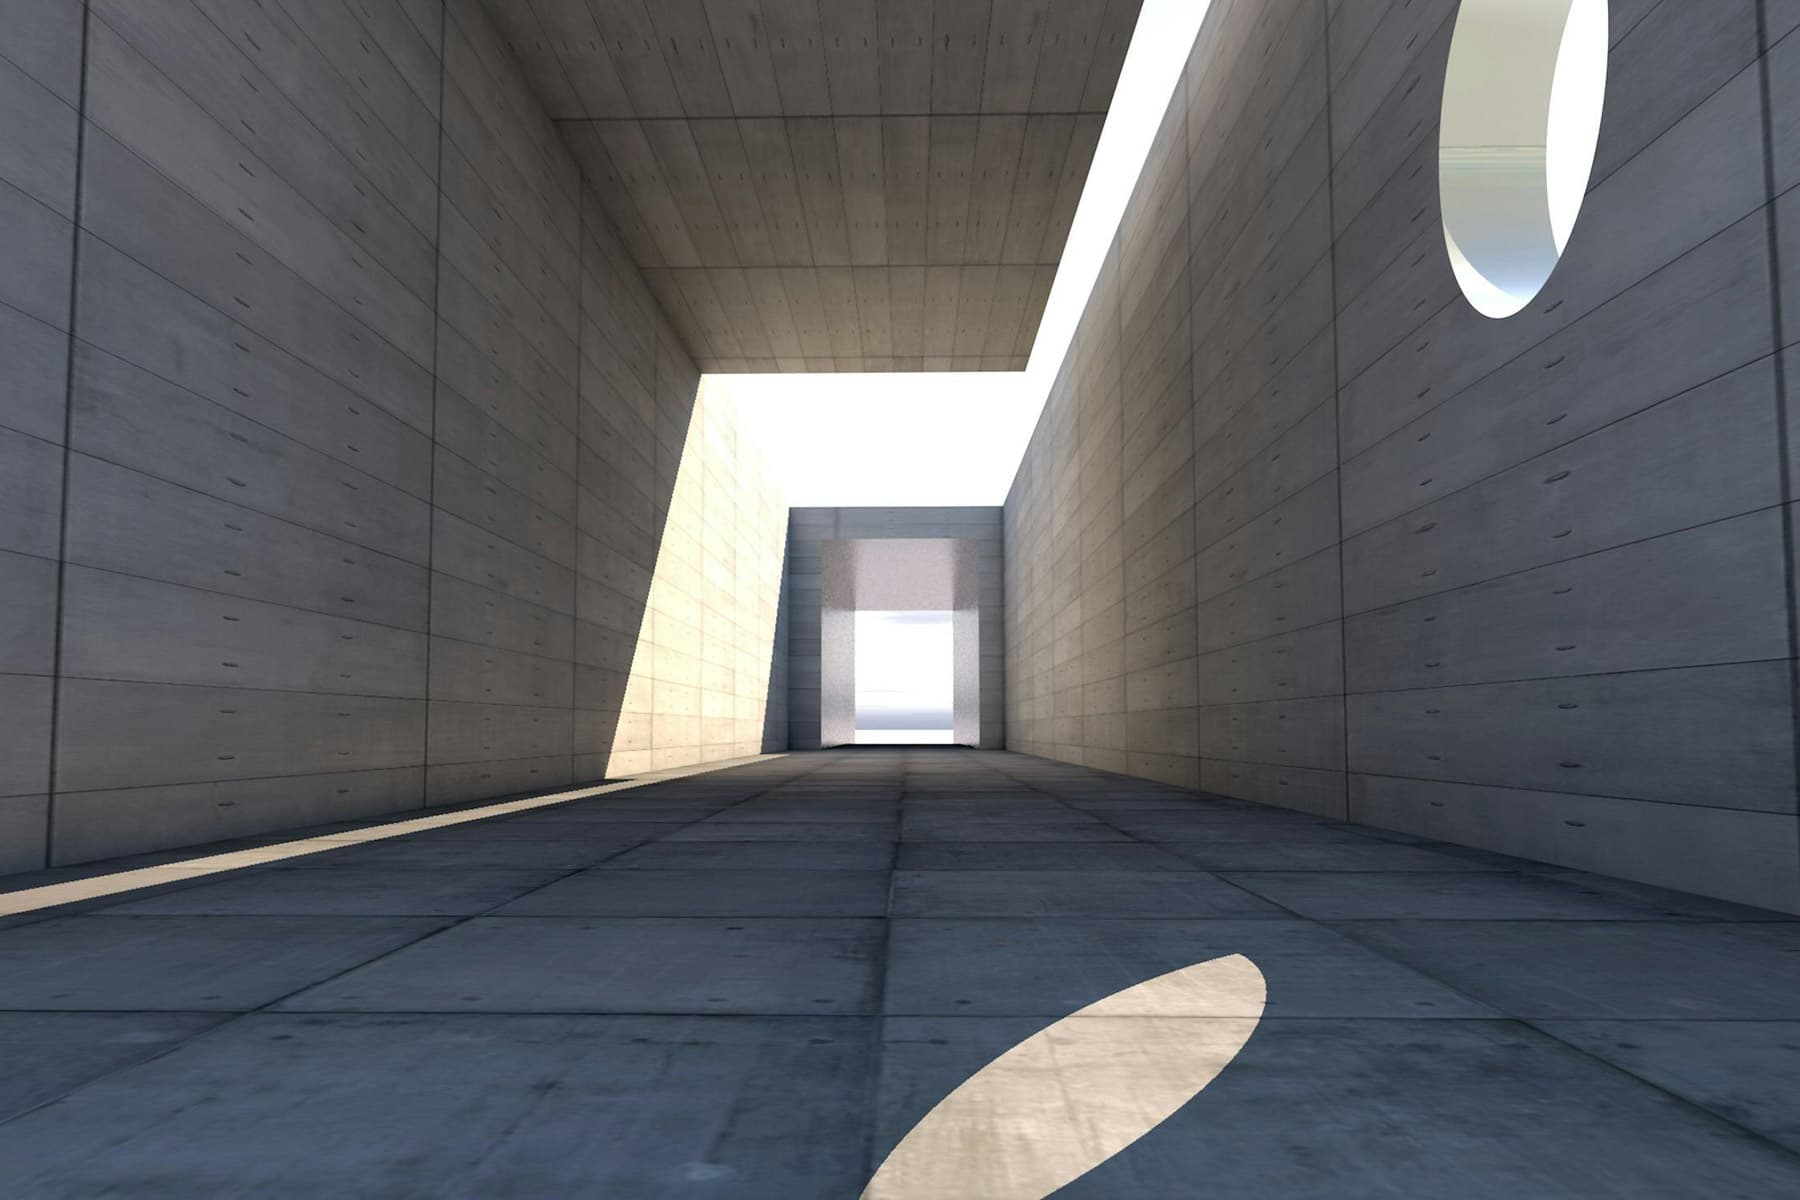
Perspective control
The fundamental rule of architecture photography: keep vertical lines perpendicular to the frame. When you tilt your camera up to capture a tall building, vertical lines converge, creating the keystoning effect where buildings appear to fall backward.
Three solutions exist: shoot from the midpoint height of the building (often impossible), use a tilt-shift lens to correct perspective in-camera, or correct perspective in post-processing (accept some image quality loss).
1-point perspective
A 1-point perspective shows the building straight-on with horizontal lines at 0 degrees. This captures elevations (front, side, rear) accurately. Align your camera parallel to the building facade. Use your bubble level to ensure the camera is perfectly level.
2-point perspective
A 2-point perspective shows the building from a corner, revealing two facades simultaneously. This creates depth and dimension. Shoot from a 45-degree angle while keeping vertical lines at 90 degrees to the frame. This perspective adds visual interest through diagonal lines.
Leading lines & shapes
Look for lines created by architectural elements. Hallways, staircases, columns, and beams create leading lines that guide the viewer's eye through the composition. Use these lines to emphasize the building's design and create depth.
Symmetry works beautifully in architecture photography. Position yourself centrally to capture perfectly symmetrical facades. Reflections in glass or water double the impact.
Framing & detail shots
Don't only shoot entire buildings. Capture architectural details that reveal craftsmanship and design intent. Ornate windows, decorative cornices, interesting textures, and material details tell the building's story. Use a longer lens (85mm-135mm) to isolate these elements.
Frame buildings through archways, doorways, or tree branches to add depth and context.
Lighting techniques for architecture photography
Light makes or breaks architecture photography. Film's response to natural light creates unique challenges and opportunities.
Natural light strategies
Side light from 45 degrees creates dimension and reveals texture. This lighting emphasizes the three-dimensional form of buildings and casts shadows that define architectural details. Shoot in morning or late afternoon when the sun is low.
Front lighting illuminates building facades directly but creates flat, dimensionless images. Avoid shooting buildings with the sun directly behind you unless documenting for record purposes.
Window light provides natural illumination for interior architecture photography. Position yourself to capture how natural light interacts with interior spaces. This reveals the architect's lighting design intent.
Golden hour & blue hour
Golden hour (first hour after sunrise, last hour before sunset) provides warm, directional light perfect for architecture photography. The low angle creates long shadows and the golden hour aesthetic that adds warmth to building facades.
Blue hour photography (20-40 minutes after sunset) captures buildings with artificial lighting against deep blue skies. This creates the blue hour aesthetic where interior lights glow warmly. Shoot Portra 400 or Portra 800 during blue hour for balanced exposures between sky and building lights.
Challenging lighting scenarios
High-contrast scenes with bright sky and dark building facades exceed film's latitude. Expose for the building and accept blown sky, or expose for the sky and accept dark building (shoot silhouettes intentionally).
For interiors with windows, bracket heavily. Shoot one exposure for the interior, one for the windows, then blend in post-processing or accept the contrast as part of film's aesthetic.
Architecture photography workflow & shooting tips
A systematic approach maximizes success and reduces wasted film.
Preparation & planning
Scout locations during daylight to identify compositions. Research the building's history and design to understand what makes it architecturally significant. Check weather forecasts for clear skies or interesting cloud formations.
Checklist: appropriate film loaded, spare rolls, tripod, bubble level, cable release, external light meter, notebook for exposure notes, lens cloth.
Arrive early to set up before optimal light. Compose carefully using your bubble level to ensure straight lines.
During the shoot
Start with establishing shots showing the entire building in context. Move closer for facade details. Enter the building (if possible) for interior shots. Capture architectural details with a longer lens.
Bracket exposures for high-contrast scenes. Work methodically through your shot list. Architecture photography sessions typically last 2-4 hours as you work through multiple perspectives and lighting conditions.
Adapting to challenges
When people walk through your frame, wait or use long exposures to blur them into obscurity. When harsh midday light creates extreme contrast, shoot black and white film to emphasize graphic qualities. When wind shakes your tripod, weight it with your camera bag or wait for calmer conditions.
Post-processing architecture photography
Architecture photos benefit from careful scanning and perspective correction.
Essential adjustments
Communicate with your lab about architecture photography. Request scans that preserve detail and straight lines. If you shot without a tilt-shift lens, perspective correction in post-processing is essential.
Workflow: correct perspective distortion using lens correction tools, adjust levels for tonal range, subtle contrast enhancement, correct any color casts from mixed lighting.
Architecture images need straight vertical lines. Use perspective correction tools to fix converging verticals. This crops the image slightly but maintains architectural accuracy.
Consistency & style
Architecture photography portfolios shine when technical execution remains consistent. Develop all film from a shoot with the same lab. Batch process basic adjustments. Individual tweaks handle specific exposure variations.
Common mistakes & how to avoid them
Even experienced photographers make these architecture photography mistakes.
Mistake 1: Tilting the camera up
Tilting your camera up to capture tall buildings creates converging verticals where the building appears to fall backward. Instead, shoot from the midpoint height, use a tilt-shift lens, or correct perspective in post-processing.
Mistake 2: Wrong aperture choice
Shooting wide open (f/2.8) creates shallow depth of field where parts of the building go soft. Instead, use f/8 to f/16 to keep everything sharp from foreground to background.
Mistake 3: Insufficient stability
Hand-holding at slow shutter speeds creates blur. Instead, use a sturdy tripod and cable release. Wait 2-3 seconds after mirror-up before opening the shutter.
Mistake 4: Ignoring the bubble level
Shooting without checking level creates crooked horizons and tilted buildings. Instead, use a bubble level on your camera's hot shoe to ensure perfect alignment.
Mistake 5: Not bracketing contrast
Shooting single exposures in high-contrast scenes wastes opportunities. Instead, bracket heavily: calculated exposure, -1 stop, +1 stop. Film latitude is limited in extreme contrast.
Pro architecture photography tips & techniques
Once you've mastered the basics, these advanced techniques elevate your architecture photography.
Use hyperfocal distance: Focus one-third into the scene to maximize depth of field from foreground to infinity. This ensures sharpness throughout the architectural composition.
Shoot in overcast conditions: Cloudy skies provide even, diffused light that minimizes contrast and reveals architectural details without harsh shadows. This creates matte colors that work beautifully for documentation.
Include context: Show buildings in their environment. Include surrounding structures, landscape elements, or people for scale. This reveals how architecture relates to its setting.
Embrace symmetry: Architecture often features perfect symmetry. Position yourself centrally and use your bubble level to capture perfectly balanced compositions that emphasize design intent.
Film's future, your pocket
Architecture photography on film represents precision and artistry that make this genre special—the organic grain structure that adds texture to building surfaces, the discipline of getting perspective correct in-camera, the tangible satisfaction of technical mastery without instant feedback. At Daydream, we've studied these exact characteristics—the gentle tonal transitions, the authentic color response, the natural grain—to bring genuine film emulation to mobile photography. We're not replacing film; we're making it accessible for moments when loading Ektar 100 isn't practical. Our app is free, no subscription or ads. Whether you shoot architecture photography with film, a phone running Daydream, or both—you're keeping the film aesthetic alive.
Gear recommendations summary
* Prices as of December 2024 – always check current pricing. These are starting points, not requirements.
| Category | Budget Option | Mid-Range | Professional |
|---|---|---|---|
| Camera Body | Any manual SLR with level ($50-150) | Nikon FE2 ($300-500) | Pentax 67 ($800-1500) |
| Primary Lens | 28mm f/2.8 ($150-300) | 24mm f/2.8 ($300-600) | 24mm tilt-shift ($1200-2000) |
| Film Stock | Kodak Gold 200 ($8-10/roll) | Portra 400 ($15-18/roll) | Ektar 100 ($12-15/roll) |
| Key Accessory | Basic tripod + bubble level ($50-80) | Manfrotto tripod ($150-300) | Gitzo carbon fiber ($400-800) |
FAQs (intent catchers)
What are the best camera settings for architecture photography?
For architecture photography on film, use manual mode with small apertures (f/8 to f/16) for deep depth of field, ISO 100-400 film for fine grain and detail, and shutter speeds from 1/60 to several seconds depending on light (tripod required). Keep vertical lines perpendicular to the frame using a bubble level. Shoot Ektar 100 for exteriors in bright light, Portra 400 for versatility, and Portra 160 for interior spaces with soft pastels. Bracket exposures for high-contrast scenes.
What camera is best for architecture photography?
The best camera for architecture photography has interchangeable lenses, reliable metering, and accepts perspective control lenses. The Nikon FE2 excels with dependable metering and sturdy build, while the Pentax 67 offers exceptional detail for medium format. For beginners, any manual SLR with a bubble level works if paired with wide-angle lenses. Honestly, a sturdy tripod and proper technique matter more than expensive camera bodies.
How do I keep vertical lines straight in architecture photography?
Keep vertical lines straight by ensuring your camera is perfectly level (use a bubble level) and parallel to the building facade. Never tilt your camera up or down. If you must capture a tall building, shoot from the midpoint height, use a tilt-shift lens to correct perspective in-camera, or correct converging verticals in post-processing. The 1-point perspective (straight-on view) naturally keeps verticals at 90 degrees to the frame.
What lens should I use for architecture photography?
For architecture photography, 24mm to 35mm wide-angle lenses work best because they capture expansive building facades and interior spaces. A 28mm f/2.8 offers excellent versatility. For perspective control, invest in a 24mm or 35mm tilt-shift lens ($1200-2000) to correct converging verticals in-camera. Standard 50mm lenses work for architectural details. Budget option: any wide-angle lens delivers good results with perspective correction in post-processing.
How do I photograph buildings in high-contrast lighting?
Photograph buildings in high-contrast lighting by bracketing exposures heavily. Shoot one exposure for highlights (bright sky or windows), one for midtones (building facade), and one for shadows (dark areas). Film's latitude is limited, so accept that you'll lose detail in either highlights or shadows. Alternatively, shoot during overcast conditions for even, diffused light that minimizes contrast and reveals architectural details.
What are common architecture photography mistakes?
The most common architecture photography mistakes are: tilting the camera up (creates converging verticals), using wide apertures (creates shallow depth of field), hand-holding at slow shutter speeds (creates blur), ignoring the bubble level (creates crooked horizons), and not bracketing high-contrast scenes (wastes opportunities). Tilting the camera is most detrimental—it makes buildings appear to fall backward and looks unprofessional.
What film stock is best for architecture photography?
For architecture photography, Ektar 100 offers the best combination of fine grain, exceptional sharpness, and accurate color for detailed building documentation. Portra 400 provides versatility for mixed lighting conditions and interior spaces. Portra 160 renders soft pastels beautifully for interior architecture photography. For black and white architectural work, Tri-X 400 or HP5 Plus emphasize contrast and texture. Start with Ektar 100 for exteriors and Portra 400 for versatile performance.
How do I photograph architecture interiors on film?
Photograph architecture interiors by using a tripod (absolutely required), small apertures (f/8-f/11) for depth of field, and long exposures (1-4 seconds) to gather enough light. Shoot Portra 400 or Portra 160 for interior spaces with window light. Bracket exposures heavily because contrast between windows and interior exceeds film's latitude. Use an incident light meter or spot meter on walls for accurate readings. Position yourself to show how natural light interacts with the space.
Conclusion: Your architecture photography journey
Architecture photography demands technical precision, perspective control, and patience, but the results capture buildings with dimension that makes viewers appreciate design and craftsmanship. Start with a sturdy tripod and bubble level—these fundamentals matter more than expensive gear. Practice builds perspective control skills and compositional eye faster than overthinking every shot.
Remember: even professional architecture photographers struggle with perspective distortion and exposure management when starting. Every experienced photographer wasted frames on converging verticals and blown highlights. The difference is persistence and learning from each roll.
Next steps:
- Load Ektar 100 and shoot local buildings to practice perspective control
- Study the 1-point and 2-point perspectives on architectural subjects
- Research bubble levels and perspective correction techniques
Your unique perspective on architecture photography matters because buildings tell stories about design, culture, and human creativity. Now get out there and capture the structures around you.
- •Load Ektar 100 and shoot local buildings to practice perspective control
- •Study the 1-point and 2-point perspectives on architectural subjects
- •Research bubble levels and perspective correction techniques
Author notes (E-E-A-T)
Written by: Daydream Content Team — photographers with 15+ years of combined experience shooting architecture photography, building documentation, and interior spaces on film and digital.
Experience: Hundreds of architectural shoots from historic landmarks to modern skyscrapers. Extensive work with perspective control, tilt-shift lenses, and exposure management across multiple film stocks.
Gear used: Nikon FE2, Pentax 67, Contax T2, Olympus Mju II, various wide-angle and tilt-shift lenses. Primary film stocks: Ektar 100, Portra 400, Portra 160, Tri-X 400, all with proper perspective control.
Teaching background: Workshops on architecture photography technique, perspective control, and exposure management for photographers transitioning from digital to film.
Conflicts of interest: Daydream is our film emulation app. We believe in authentic film photography and created Daydream to make film aesthetics more accessible.
Related Topics
Related Articles
Coming Soon to iOS
Join the beta to experience authentic film photography with Daydream Film when we launch.